Markup Sets
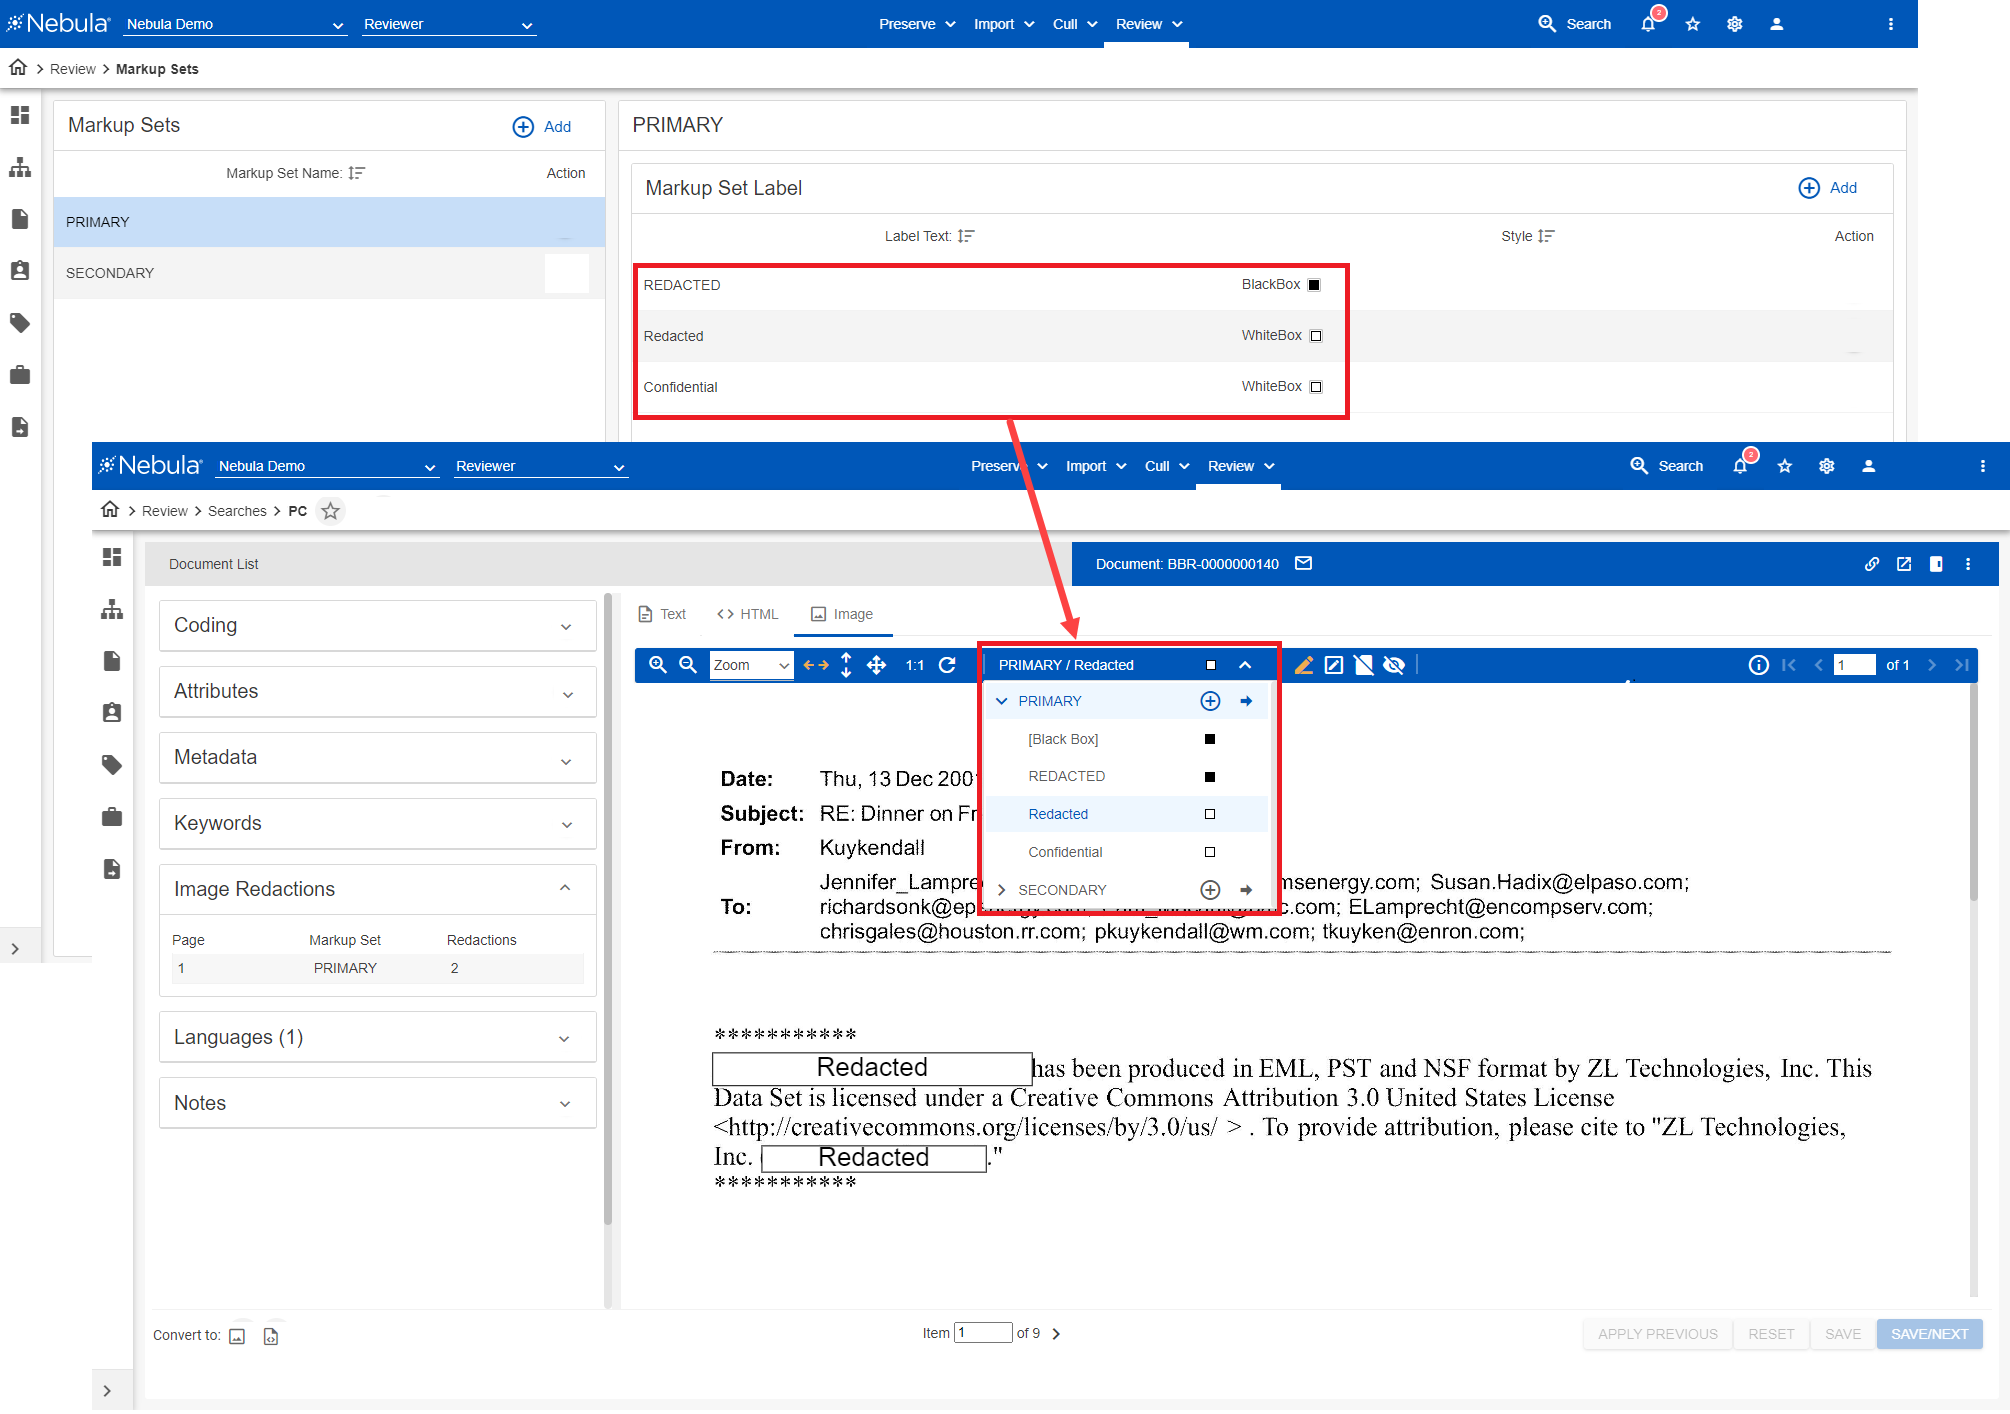
Using markup sets in Nebula, you can apply redactions on documents to privileged images in selected areas or to entire pages. Use the Markup Sets page to create and manage sets of redaction styles (including redactions and highlights) at the matter level for use on the Review Document Viewer. Redactions can appear as either a black box or a white box with a black border and label in the Image view.
Markup sets can also be used with automatic redaction, printing documents from the Document List, exports, and productions.
While every Matter has one default markup set titled “Primary” that is created automatically and can be renamed, additional markup sets can be created.
Markup sets are limited to a matter and a matter can multiple markup sets. Each markup has the ability to add custom labels. The default markup set option is a black box with no label. If a white box is created, it must include a label.
Object Security can be configured so that markups can be searched with the Search Builder with the following filters:
- Markups (Redaction Type): Search by type of markup up.
- Markups (Style): Search by markup set and style.
To open the Markup Sets page
- Click Review > Review Management > Markup Sets.
To add a markup set
- In the Markup Sets menu bar, click Add.
- In the Markup Set dialog box, enter the Markup Set Name and click Save.
Note: A Markup Set Name cannot exceed 50 characters.
To edit a markup set
- In the Markup Sets section, locate the markup set to edit, click its Action icon
 and select Edit.
 - In the Markup Set dialog box, update the Markup Set Name and click Save.
To add a markup set label
- In the Markup Sets section, select the markup set you want to receive a new markup set label.
- In the Markup Set Label menu bar, click Add.
- In the Add Markup Set Label dialog box, view the Markup Set , enter the new Label Text.
- Select the color of the mark up: black or white.
- Click Create.
Note: Label Text cannot exceed 50 characters or duplicate an existing label.
To edit a markup set label
- In the Markup Sets section, select the markup set with the label you want to edit.
- In the Markup Set Label section, locate the markup set label to edit, click its Action icon and select Edit.
- In the Edit Markup Set Label dialog box, view the Markup Set , update the Label Text accordingly.
- Update the color of the mark up accordingly: black or white.
- Click Save.
Note: When you edit a markup set label, all work products using that label are updated with the new text.
To delete a markup set label
- In the Markup Sets section, select the markup set with the label you want to delete.
- In the Markup Set Label section, locate the markup set label to delete, click its Action icon and select Delete.
- On the Delete Market Set Label dialog box, click Delete.
To set the object level security of a markup list
- In the Markup Sets section, select the markup set with the label you want to work with.
- Click its Action icon and select Object Security.
- Complete the Object Security dialog box.