Exporting Data
The export data function in Nebula creates a non-production of the documents in the Document List. You can review the results on the Export Details page.
To create an export without production
- Open a Document List containing the documents you want to export.
- On the Review Document List, click the Action icon
 and select Export Data (non production).
 - On the Export Without Production dialog box, complete the following sections:
- Enter a Name for the batch.
- Select a Loadfile Format from the following:
- CSV
- Concordance
- Summation
- Select the Charset (character set for encoding the metadata and text files of the export.)
- Include: Select the items included in the export from the following:
- Natives
- Text
- Images
- Export as PDF
- If exporting Natives, select the Export Natives - Application Categories.
- Endorsement Profile: Select a profile to apply endorsement to the printed document images.
- Markup Set: Select a markup set to be included in the Export. (Either Natives or Images must be selected to Include for this be to available.)
- If you want to include highlights, select Include Highlights.
- To create a zip file of the download of the export, select Create a ZIP file of the Export.
- Select an existing profile, or clone or add a new profile.
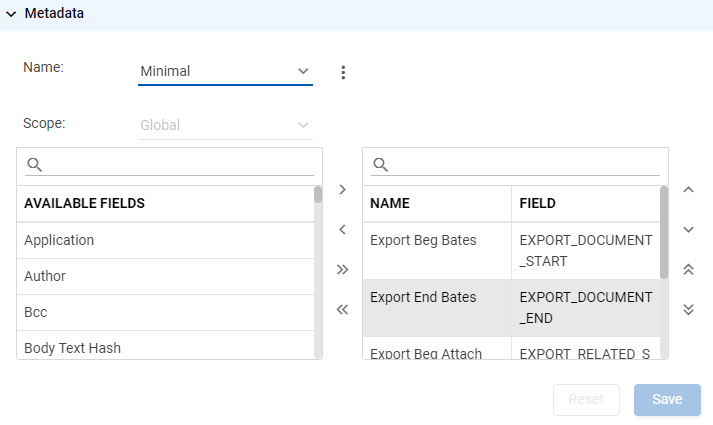
- Enter the Name for the non-production export and select its Scope. (Selecting
MatterorUserenables you to export coding fields.) - Select from the AVAILABLE FIELDS list the metadata to include in your profile view.
- Click Save.
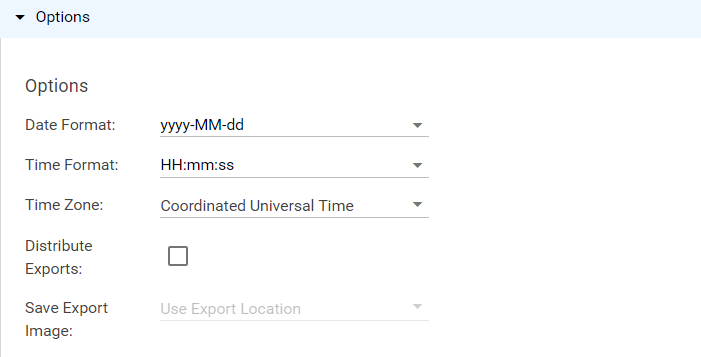
- Select or enter the Date Format.
- Select or enter the Time Format.
- Select the Time Zone for the metadata (defaults to the time zone when the matter was created.)
- (Supuser only) Select to Distribute Exports across users. (If selected, complete the Distribution section).
- Select Save Export Image to save images in the database. Clear for non-production exports.
- Click Export.
- View the status of the export on the Export History page.
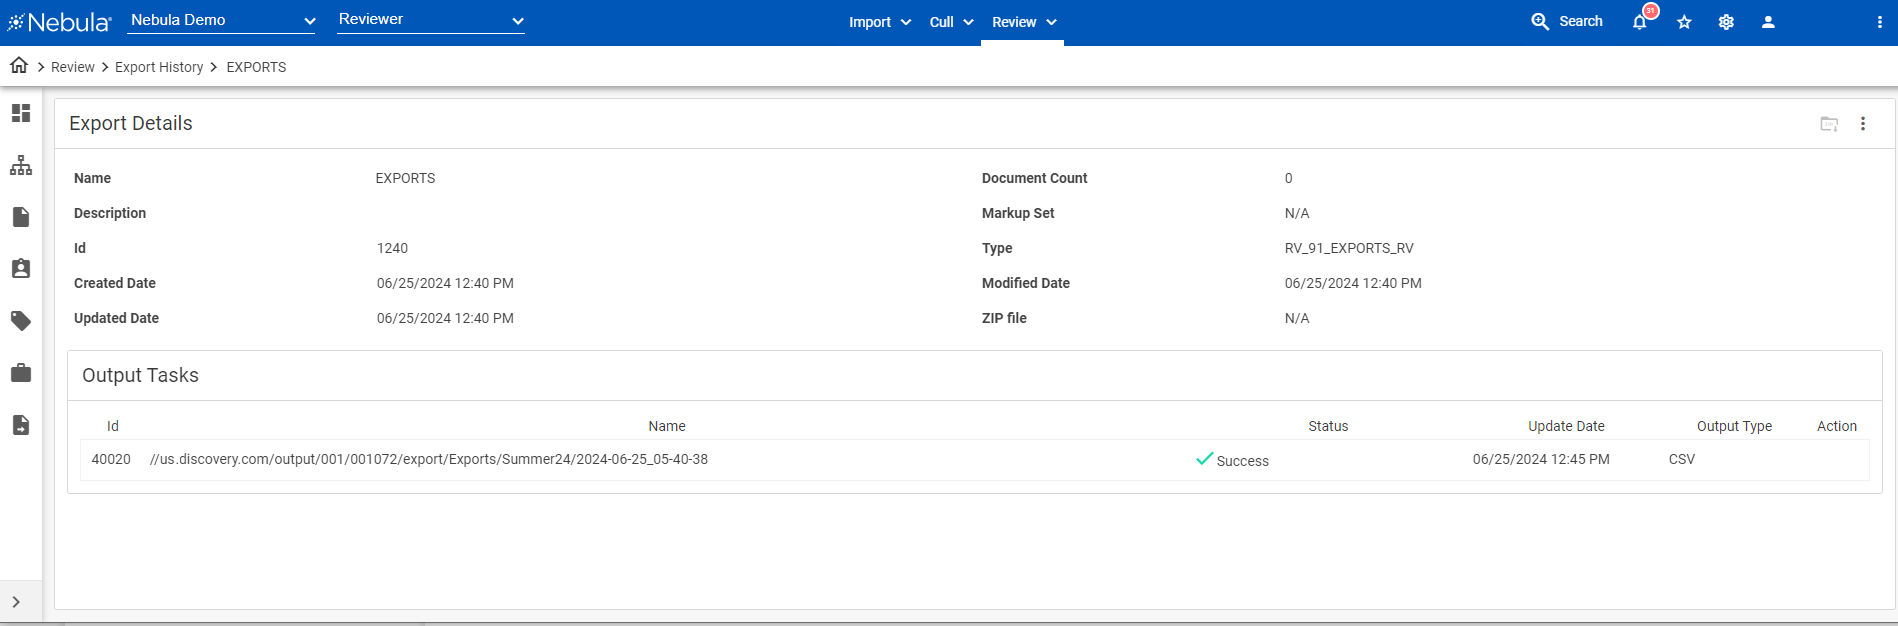
- In the Export Details section, view the following:
- Name
- Description
- Id
- Created Date
- Updated Date
- Document Count
- Markup Set
- Type
- Modified Date
- ZIP file
- In the Output Tasks section, view the following:
- Id
- Name
- Status
- Update Date
- Output Type
- In the Output Tasks section, the Action icon contains the following commands:
- Details: Opens the Task Details dialog box.
- Set Priority: Opens the Set Priority dialog box select the Current priority of the export.
- Cancel: Stops the export
- Pause/Resume: Pause or resumes executing the production.
- Details: Opens the Task Details dialog box.
- Delete: Opens the Delete Output Task dialog box.
- Restart: Opens the Re-export Without Production dialog box.
Note: Click Next and Back to move between sections.
Configuration
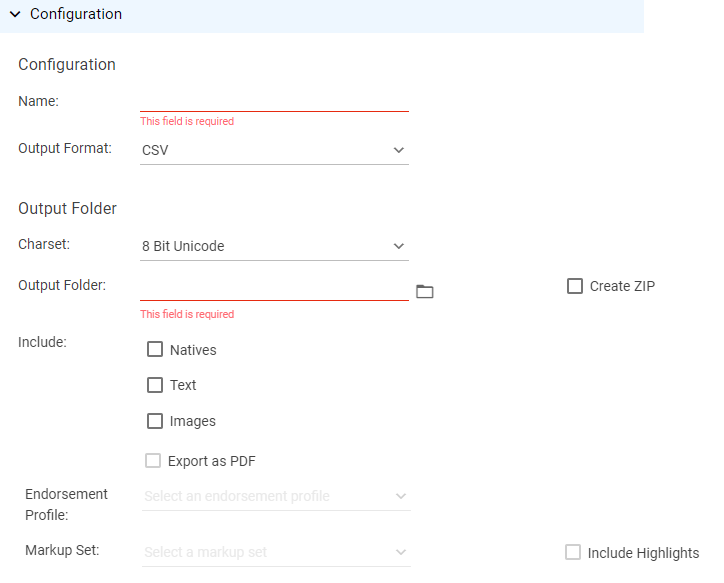
Configuration
Metadata
Options
Output Task Status: Executing Preparing
Status: Success
To view the documents in the export
- In the Export Details header, click the Action icon
 and select View Documents.
 - In the Document List (Review), view the documents included in the export.
To edit the export
- In the Export Details header, click the Action icon and select Edit.
- On the Edit Export dialog box, update the Name and Description accordingly, then click Save.
To delete the export
- In the Export Details header, click the Action icon and select Delete.
- On the Delete Export dialog box, click Delete.
To reexport the export
- In the Export Details header, click the Action icon and select ReExport.
- Complete the Re-Export Without Production dialog box.
To set the object level security for an export
- In the Export Details header, click the Action icon and select Object Security.
- Complete the Object Security dialog box.
Export ZIP Files
If you selected Create a ZIP file of the Export in the Configuration section of the Export Without Production or Re-Export Without Production dialog boxes, the Download icon is available in the Export Details header.

To download a ZIP file from Export Details
- In the Export Details header, click the Download icon
 .
. - On the Download Export dialog box, view the Name, Size, and number of Documents included in the ZIP file that will download, click Download.
If you did you select Create a ZIP file of the Export in the Configuration section of the Export Without Production or Re-Export Without Production dialog boxes, the Download icon is Unavailable in the Export Details header.

To download a ZIP file from Export Details when the Download icon is unavailable
- Click the Action icon and select Create Zip.
Nebula begins zipping the export .
. - When available, click the Download icon .To view the status of the task, click the Notifications icon
 and view the Zip Export.
 - On the Download Export dialog box, view the Name, Size, and number of Documents included in the ZIP file that will download, then click Download.
To recreate a ZIP file of the documents in the export
Note: Recreating a ZIP file overwrites the existing ZIP fil associated with the export.
- In the Export Details header of the the previously zipped export, click its Action icon and select Recreate Zip.
- On the Recreate ZIP dialog box, view the Name and number of Documents included in the ZIP file that will download, then clickProceed.
- To view the status of the task, click the Notifications icon and view the Zip Export.