Endorsement Profiles
Use the Endorsement Profiles page in Nebula to set the values of endorsements (such as a bates number or confidentiality notice) on images exported to production. Dynamic or static text endorsements can be added to the header (above) or footer (below) on a document.
Note: For additional information, please see Endorsement Profiles & Placeholder Management in the Nebula Tech Blog.
To view the Endorsement Profiles page
- Click Review > Productions & Exports > Endorsement Profiles.

To add an endorsement profile
- On the Endorsement Profiles menu bar, click New Profile.
- On the New Profile dialog box, enter the Name of the endorsement profile.
- Click Create.
To clone an endorsement profile
- In the Endorsement Profiles section, locate the profile you want to clone (such as
Nebula Default Profile), click its Action icon and select Clone.
 - On the Cloned Profile Name dialog box, enter a Name for the cloned profile and click Save.
To edit an endorsement profile
- In the Endorsement Profiles section, locate the profile you want to edit, click its Action icon and select Edit.
- On the Edit Profile dialog box, update the Name as needed and click Save.
To delete an endorsement profile
- On the Endorsement Profiles section, locate the profile you want to delete, click its Action icon and select Delete.
- On the Delete Profile dialog box, click Delete.
To set the object level security of an endorsement profile
- In the Endorsement Profiles section, locate the profile you want to work with.
- Click its Action icon and select Object Security.
- Complete the Object Security dialog box.
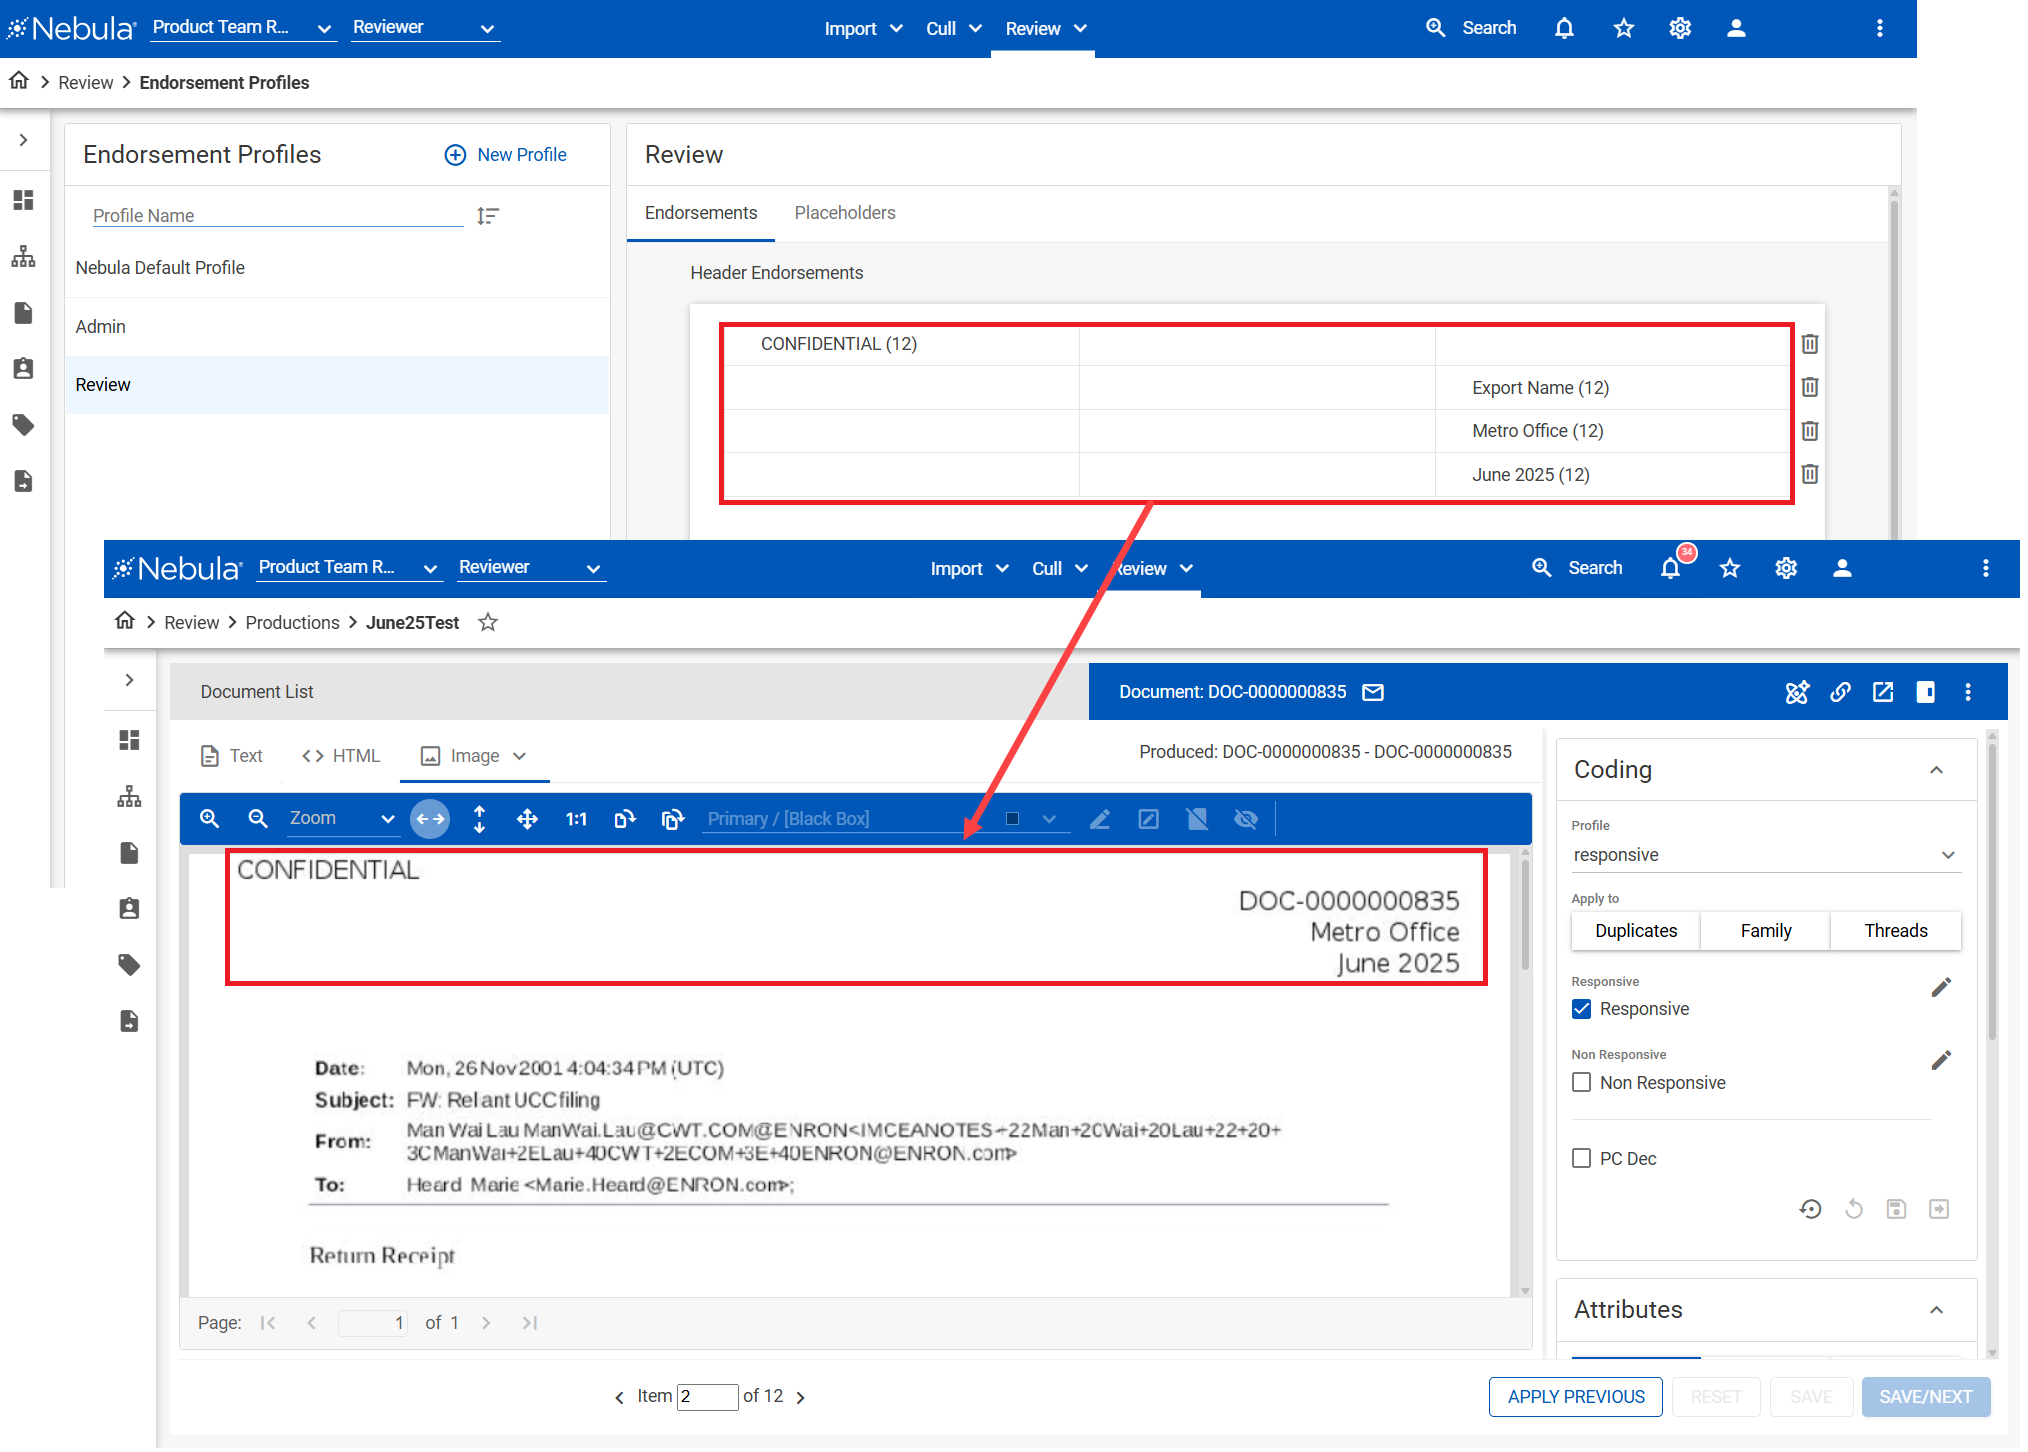
To add an endorsement to an endorsement profile
- On the Endorsement Profiles section, locate and click the profile you want to receive an endorsement.
- If you want the endorsement to appear above the document, on the Endorsements page Header Endorsement section, click Add Row.
If you want the endorsement to appear below the document, on the Endorsements page Footer Endorsement section, click Add Row. - To delete a row, click its Delete Row icon
 .
. - If you want the endorsement to appear flush left, click Add Endorsement in the left pane of the row.

If you want the endorsement to appear center, click Add Endorsement in the left pane of the row.
If you want the endorsement to appear flush right, click Add Endorsement in the left pane of the row. To reposition an endorsement, click and drag it to its desired location.
 - On the Add Endorsement dialog box, do the following:
- If Dynamic endorsements are required, click the Dynamic Text Field icon
 and select the desired text in the Dynamic Text Field. (
RADIO,TEXT, andTIMETypes can be added from using Review Fields & Tags.) - If Static endorsements are required (such as CONFIDENTIAL on all documents), click the Static Text Field icon
 and add the desired text to the StaticText Field.
 - Select the Font Size of the endorsement on the exported documents.
- Click Save.
Note: Up to four rows can be added.
To delete an endorsement row
- On the Endorsement Profiles section, locate the and click the profile with the endorsement you want to delete.
- In the Endorsements. locate the row of the click the Action icon and select Delete.
Placeholders
Placeholders enable you to create and configure a single page slipsheet to be included with the document.
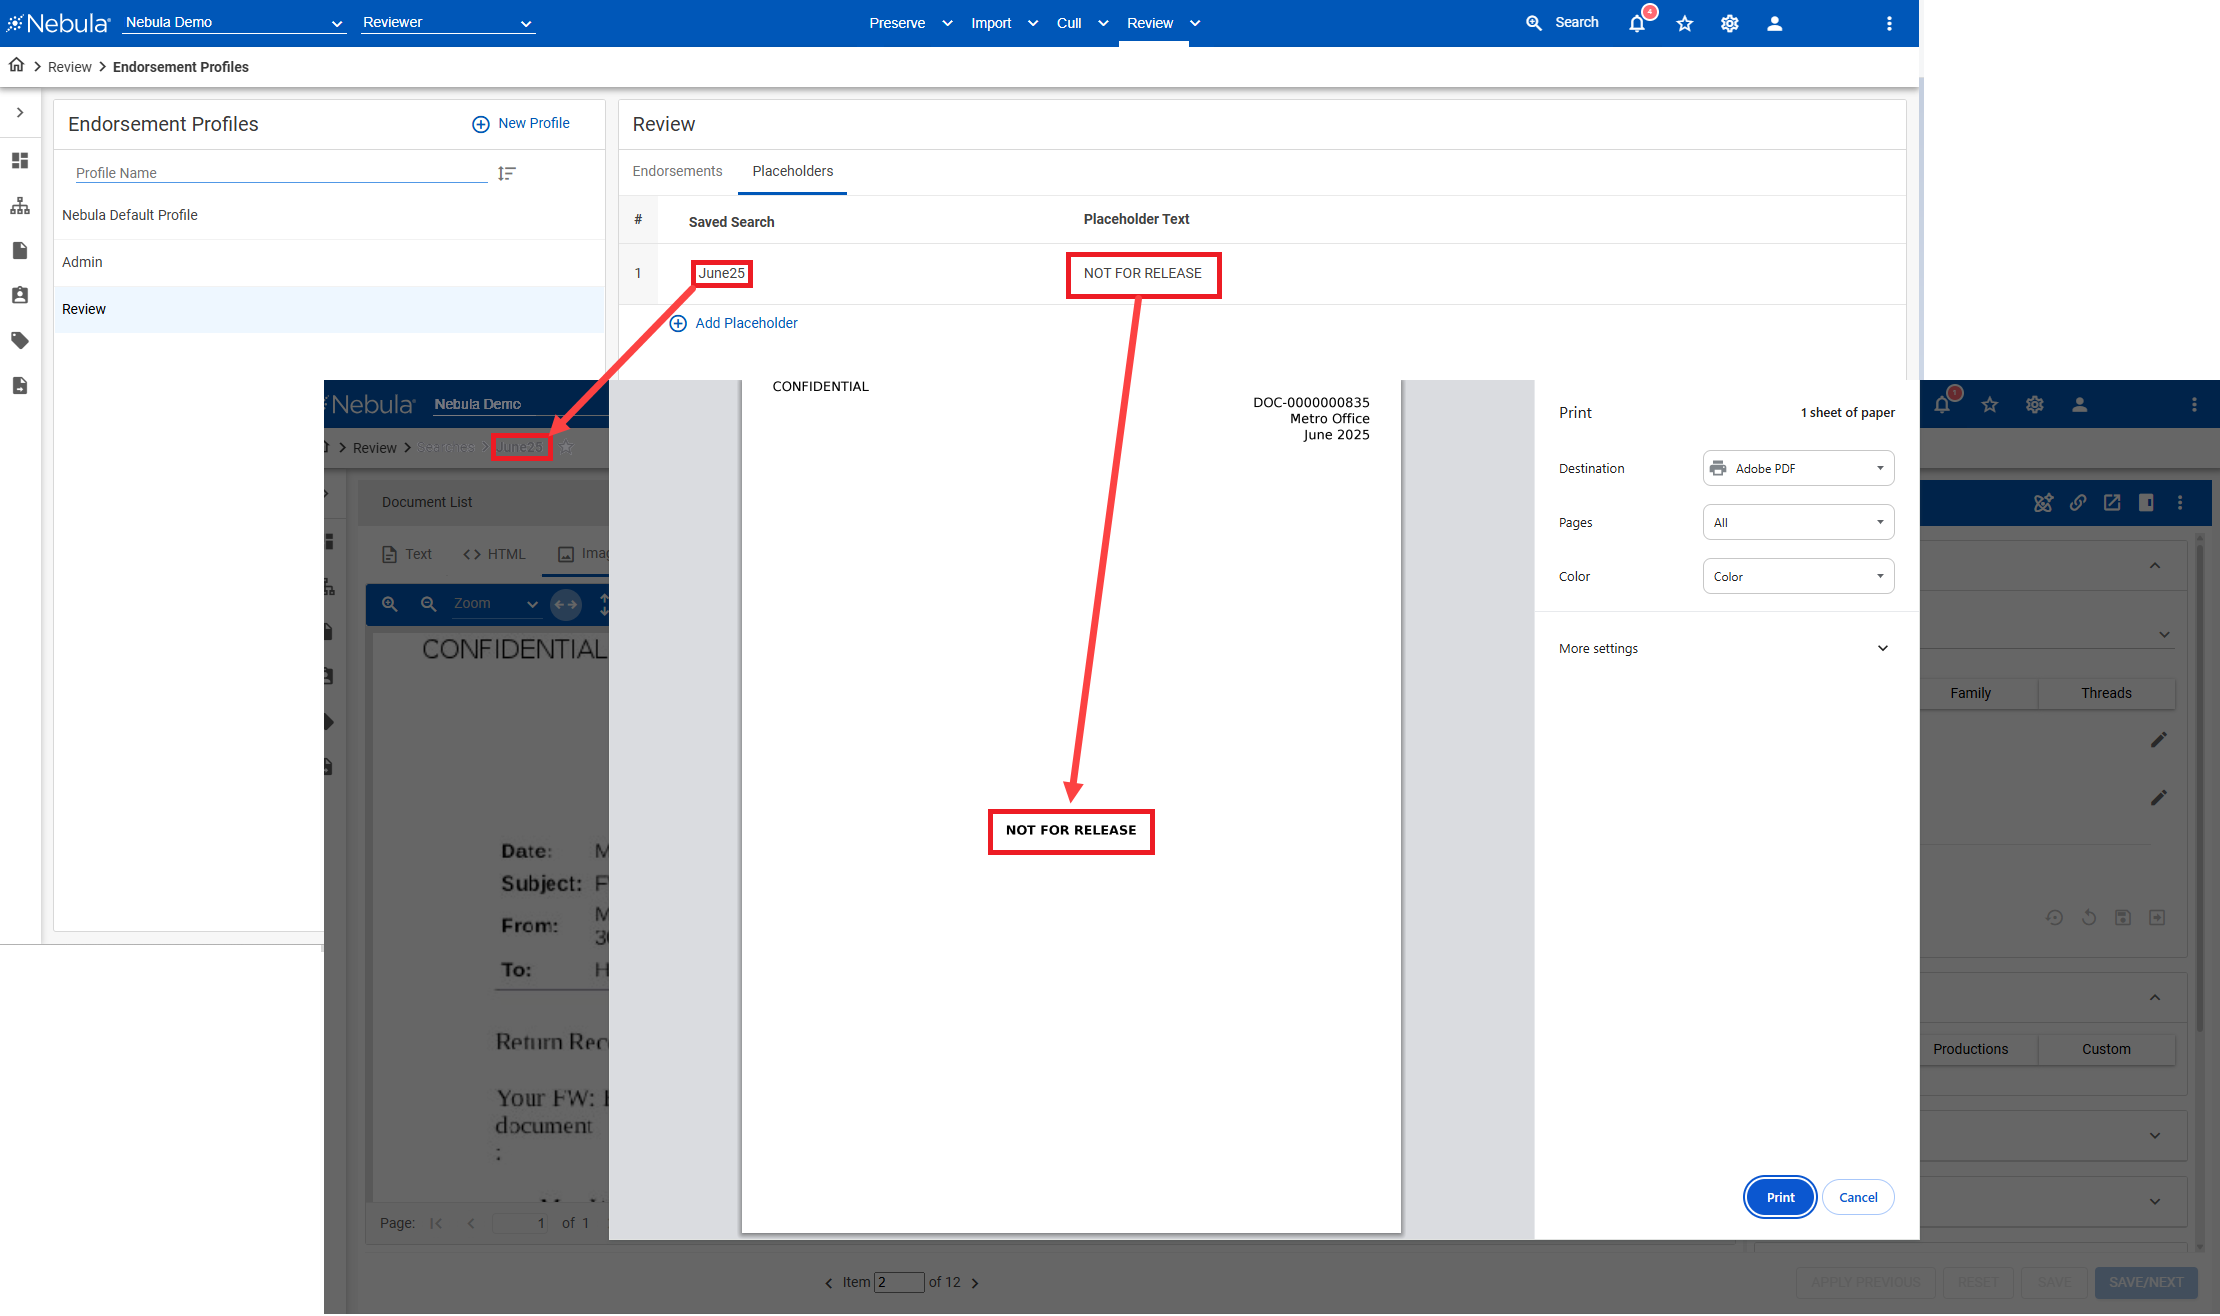
To add a placeholder to an endorsement profile
- On the Endorsement Profiles section, locate and click the profile you want to receive an placeholder.
- On the [selected Endorsement Profiles page], click the Placeholders tab.
- Click Add Placeholder.
- On the Add Placeholder dialog box, select the Saved Search with the documents you want to receive placeholders.
- Enter the Placeholder Text.
- Select the Font Size of the placeholder text.
- If you choose, select to Replace produced text with placeholder language.
-
To override exporting the native file when converting an image, select Produce native document.
-
Click Save.
-
To reposition a placeholder, click and drag it to its desired location.
To edit a placeholder
- On the Endorsement Profiles section, locate and click the profile with the placeholder you want to edit.
- On the [selected Endorsement Profiles page], click the Placeholders tab.
- Locate the placeholder you want to edit, click its Action icon and select Edit.
- On the Edit Placeholder dialog, update the placeholder as desired and click Save.
To delete a placeholder
- On the Endorsement Profiles section, locate and click the profile with the placeholder you want to delete.
- On the [selected Endorsement Profiles page], click the Placeholders tab.
- Locate the placeholder you want to delete, click its Action icon and select Delete.
- On the Delete Placeholder dialog, click Delete.