Production Overlay
The Production Overlay page enables you to import production images and Bates numbers for documents produced outside of Nebula.
Production overlays are a specific kind of data overlay used to associate a production most likely prepared outside of Nebula with existing records in a Nebula review matter. The production overlay always contains a cross-reference file, XRef, which is a delimited load file in either CSV or Concordance DAT format. The XRef file contains three columns the Document Id of the existing Nebula document receiving the overlay the BegBates and EndBates values for the produced version of the document. The XRef file should not contain a header row. The production overlay typically contains production images, along with an image load file.
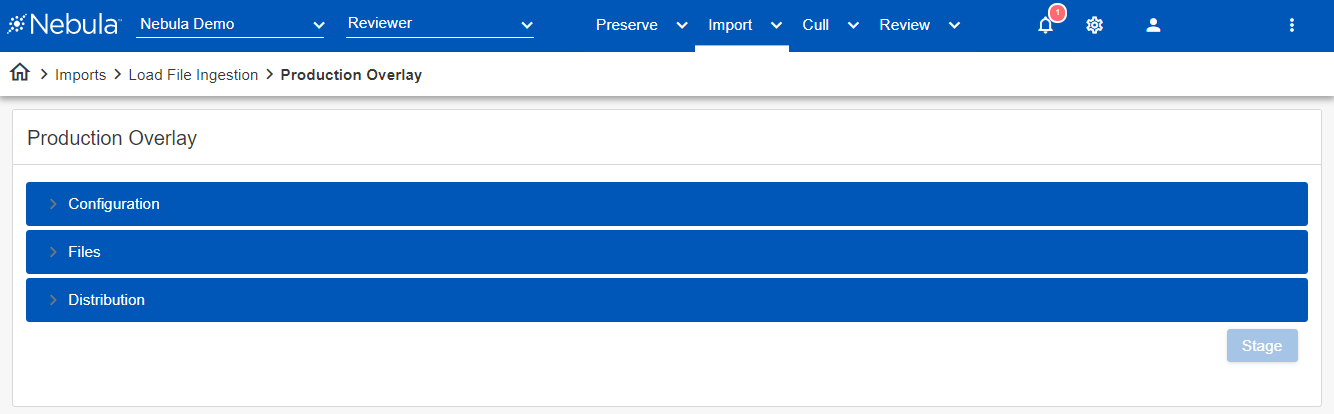
To import documents from a production overlay
- Click Import > Load File Ingestion > Production Overlay.
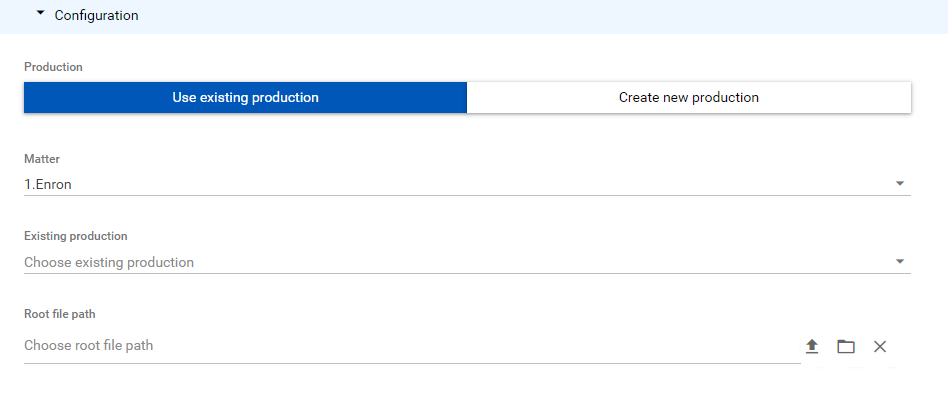
- In the Configuration section, enter the following:
- Select one of the following:
- Use existing production: Select to overlay into an existing production. (The associate production must be unlocked)
- Create new production: Select to create a new import through production import.
- Matter: Select the review matter you want to load the data into (either the existing production or the new production being imported.
- For new productions, enter an Import name.
- For existing productions, choose an Existing production.
- Root file path: Select the volume folder that contains the data and images subfolder root file path by either:
- Clicking the upload icon
 and using the File Explorer.
 - Clicking the File Browser icon
 .
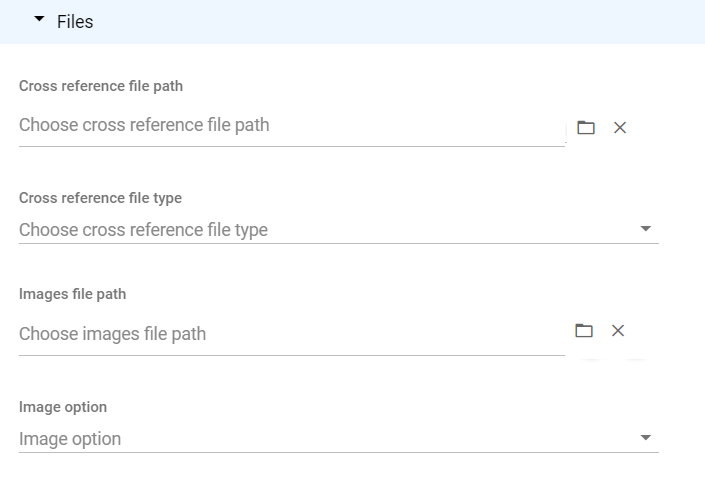
. - In the Files section, enter the following:
- Cross reference file path: Click the File Browser icon and select the location of the XRef file.
- Cross reference file path type: Choose the XRef file type.
- Image file path: Click the File Browser icon and select the location of the image load file.
- Image option: Select the type of load file for image (LFP, OPTICON, or DII).
- Click Stage to begin the staging process. If staging generates exceptions, the cause(s) must be resolved and the content will need to be re-staged. The Exceptions Summary section displays the exceptions types and counts.
- Click Commit to complete the import.
- Click Confirm.