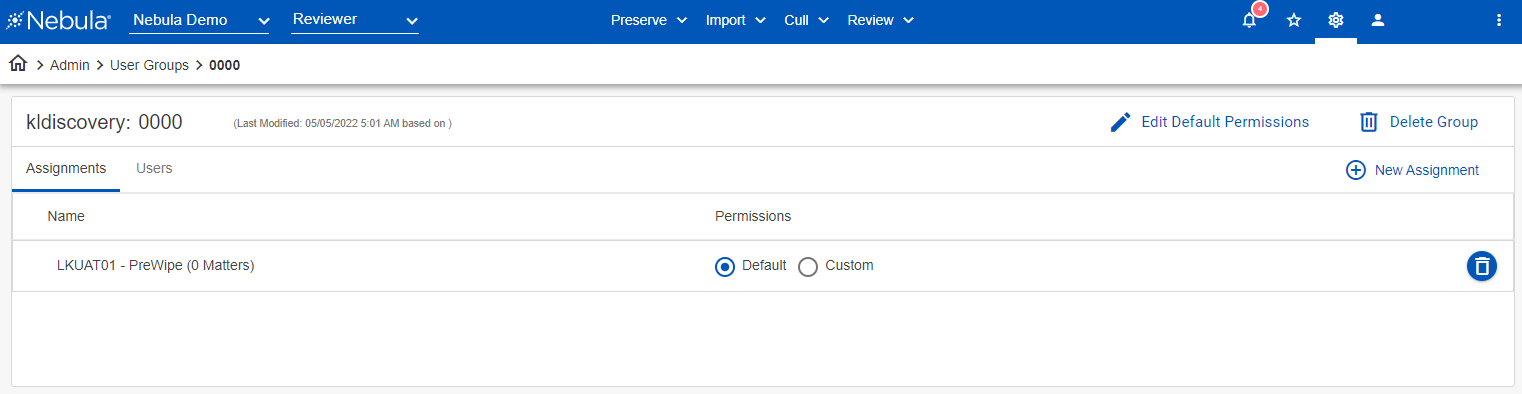
User Groups
In Nebula, permissions are not specified for individual users, but rather, users belong to user groups. User groups are then assigned to repositories and matters in the Nebula system. Each user group has a set of default permissions that attach to each assignment; however, these permissions can be customized for each assignment as needed.

To open the User Groups page
- In the Nebula menu bar, click the Admin icon
 > User Groups.
To view the Permission Templates page
- In the User Groups menu bar, click
 .
.
To create a new user group
- In the User Groups menu bar, click
 .
. - On the New Group dialog box, enter the Group Name for the new user group.
- Use the drop list to Select a Permission type for the new user group from the following:
- Regular
- Firm Admin
- System Admin
- Use the drop list to Select a Firm for the new user group.
- If you choose, use the drop list to Select a Template for the new user group. (For more information, see Permission Templates.)
- If a System Administrator, select Read Only prevent the user group from being edited by any user other than a System Administrator.
- Click Save.
Note: To ensure user groups can be easily located when needed, consider including the repository name, the group function, and the matter in the Group Name.
Repository | Reviewer | All (matters)
To edit a user group
- In the User Groups list, select the user group you want to edit and click its Edit User Group icon
 .
. - On the [selected User Group] page, update the Assignments and Users tabs as desired.
To copy a user group
Note: User groups cannot be copied across firms. The new user group will have the same firm associated as the selected user group.
- In the User Groups list, select the user group you want to copy and click its Copy User Group icon
 .
. - On the [Copy from selected User Group] dialog box, enter Name for the copied User Group and select to include the following:
- Users
- Assignments
- Permissions.
- Click Save.
To delete a user group
- In the User Groups list, do one of the following:
- Select the user group you want to delete and click its Delete User Group icon
 .
. - Double-click the user group you want to delete and on the [selected User Group] page, click
 .
. - On the Delete Confirmation dialog box, click Delete.
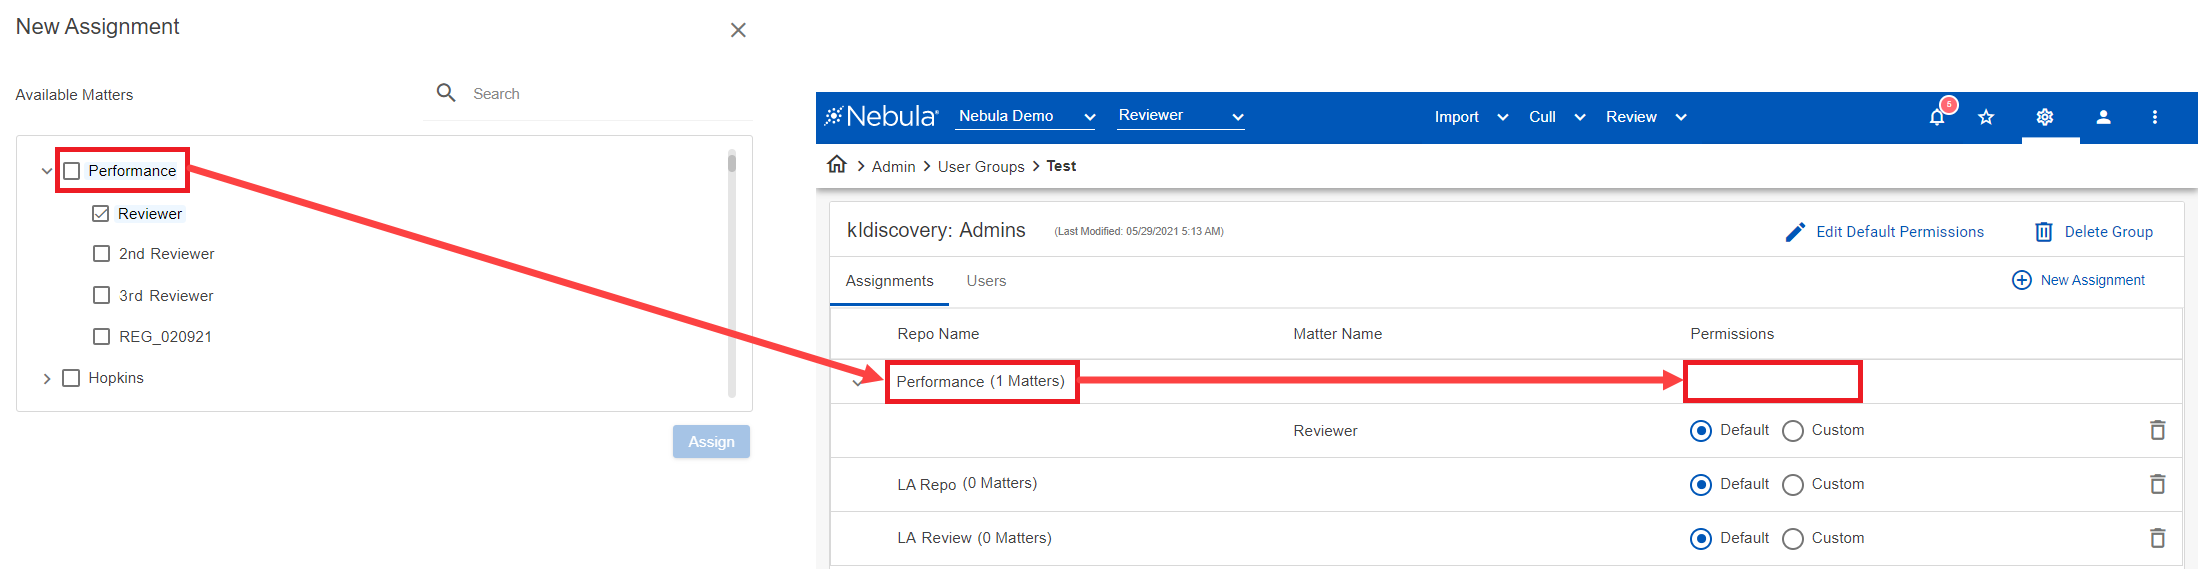
To assign repositories to a user group
- In the User Groups list, double-click the user group you want to receive repositories.
- On the Assignments tab, click
 .
. - On the New Assignment dialog box, select the repository you want assigned to the user group.
- Click the repository 's down arrow and select the matters you want assigned to the user group.
- Click Assign.
- In the Permissions column, choose to apply Default permissions or create Custom permissions.
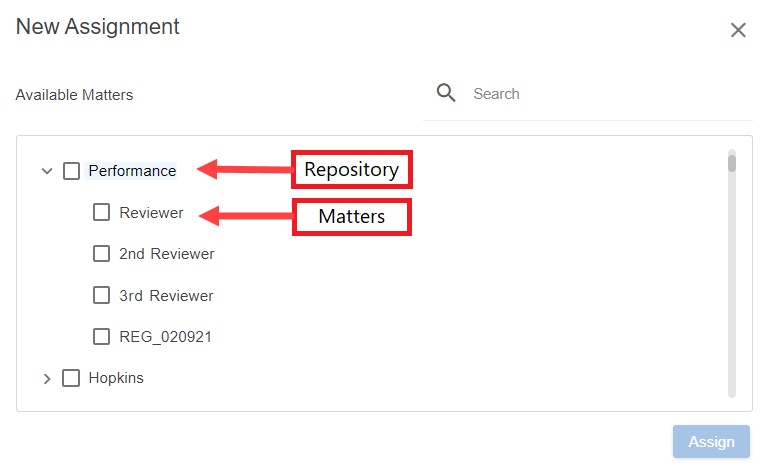
Note: If you select a matter but not its repository on the Available Matters dialog box, permissions are not available for the repository.
To remove a repository from a user group
- In the User Groups list, double-click the user group with repository you want to remove.
- On the [selected User Group] page, locate the repository you want removed and click its Delete Assignment icon .
- On the Unassign Confirmation dialog box, click Ok.
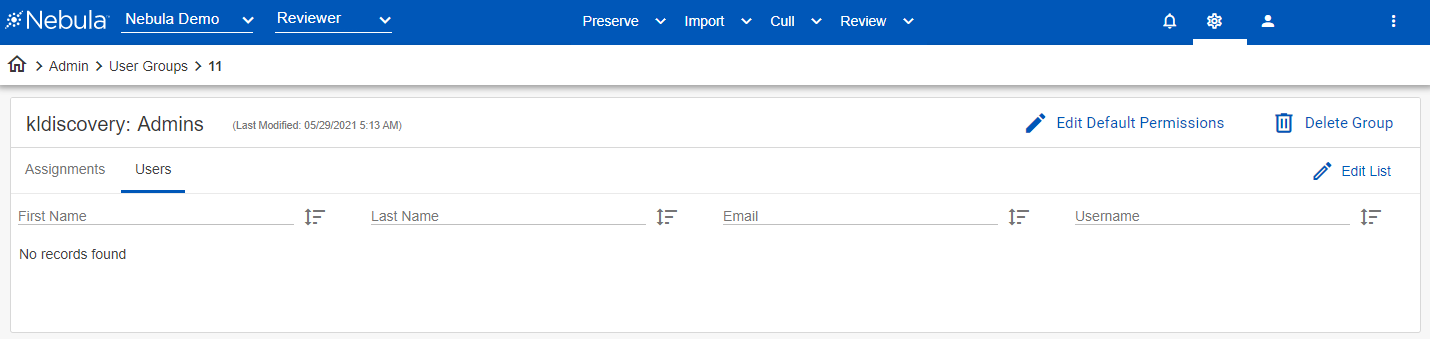
To assign users to a user group
- In the User Groups list, double-click the user group you want to receive users.
- Click the Users tab, then click Edit List.
- On the Assign Users dialog box, select from the Available Users list the users you want assigned to the user group.
- Click Assign.
- In the User Groups list, double-click the user group you want to work with.
- In the [selected User Group] menu bar, click Edit Default Permissions.
- On the Default Permissions dialog box, set the permissions for the user using the Preserve, Import, Cull, Review, General, and Admin tabs.
- To save current progress, click Save.
- Click Save & Close when you have finalized the permissions.
Note: Interdependencies exist between some permissions. For example, View must be selected to enable subsequent permissions, such as Edit, Delete, and Create; therefore, autoselection of View occurs to account for this.