Export History (Review)
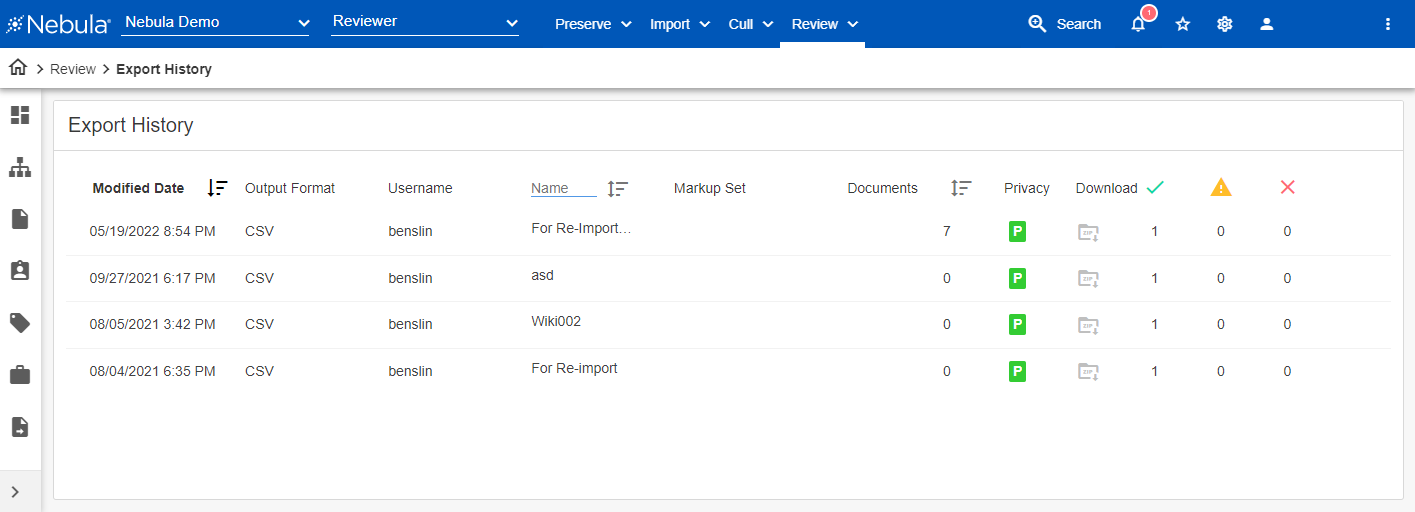
The Export History (Review) page lists the status of each document set exported from Review ...

... as well provides access to its details.

Exported document sets can be downloaded as a zip file.
To view the details of an export
- Click Review > Productions & Exports > Exports.
- In the Export History list, locate the export you want to view in detail, click its Action icon
 and select Details.
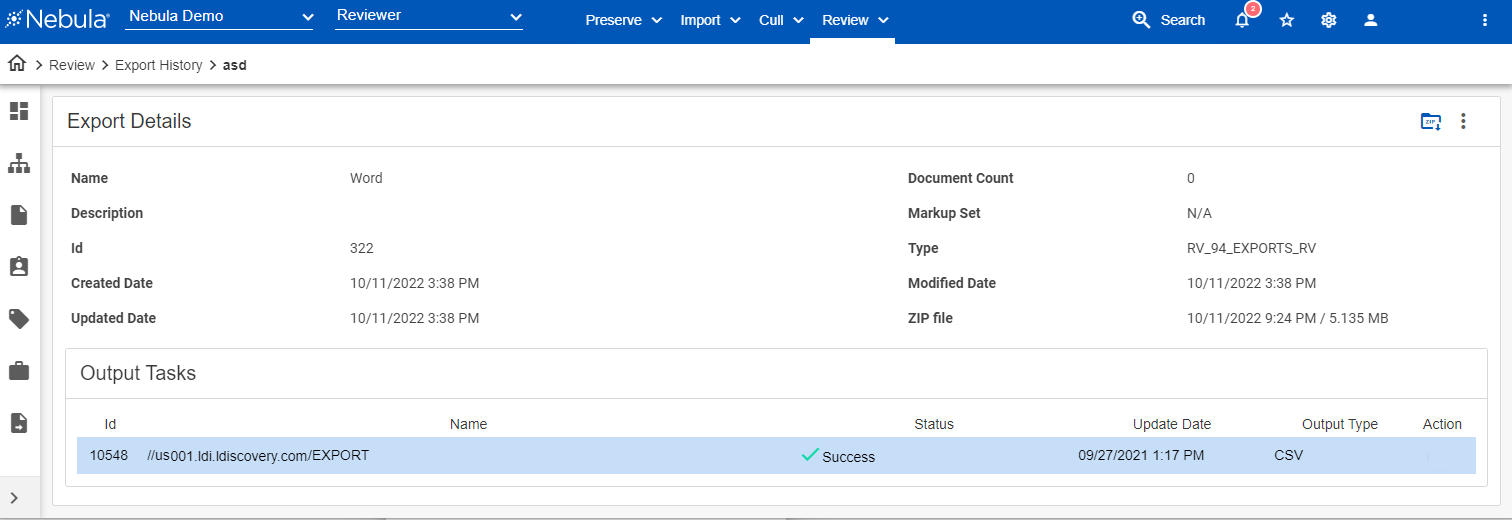
 - In the Export Details section, view the following:
- Name
- Description
- Id
- Created Date
- Updated Date
- Document Count
- Markup Set
- Type
- Modified Date
- In the Output Tasks section, view the following:
- Id
- Name
- Status
- Update Date
- Output Type
- Zip File
- In the Output Tasks section, the Action icon contains the following commands:
- Details: Opens the Task Details dialog box.
- Delete: Opens the Delete Output Task dialog box.
- Restart: Opens the Re-export Without Production dialog box.
- Refresh: Updates the Output Tasks section.
To view the documents of an export
- Click Review > Productions & Exports > Exports.
- In the Export History list, locate the export with the documents you want to view, click its Action icon
 and select View Documents.
 - View the export's documents in the Review > Export History > Document List.

To edit an export
- Click Review > Productions & Exports > Exports.
- In the Export History list, locate the export you want to edit, click its Action icon
 and select Edit.
 - On the Edit Export dialog box, update the Name and Description accordingly, then click Edit.
To delete an export
- Click Review > Productions & Exports > Exports.
- In the Export History list, locate the export you want to delete, click its Action icon
 and select Delete.
 - On the Delete Export dialog box, click Delete.
To reexport an export
- Click Review > Productions & Exports > Exports.
- In the Export History list, locate the export you want to re-export, click its Action icon
 and select ReExport.
 - Complete the Re-Export Without Production dialog box. (For a description of the sections and fields, see Exporting Data.)
To set the object level security for an export
- Click Review > Productions & Exports > Exports.
- In the Export History list, locate the export you want to work with, click its Action icon
 and select Object Security.
 - Complete the Object Security dialog box.
To refresh an export
- Click Review > Productions & Exports > Exports.
- In the Export History list, locate the export you want to refresh, click its Action icon
 and select Refresh.
To create and download a zip file of the documents in the export
- Click Review > Productions & Exports > Exports.
- In the Export History list, locate the export with the files you want to zip, click its Action icon
 and select Create Zip.
 - To view the status of the task, click the Notifications icon
 and view the Zip Export.
 - In the Export History list, locate the export you zipped and click its Download icon
 .
. - On the Download Export dialog box, click Download.
Note: Zip files can also be downloaded from the Details page by clicking the Download icon ![]() in the header.
in the header.
To download a zip file from Notifications
- In the Nebula tool bar, click the Notifications icon
 .
. - On the Notifications dialog box, locate the Zip Export and click the Download icon
 .
. - On the Task dialog box, in the Download Items section click the Download icon
 .
.
To recreate a zip file of the documents in the export
- Click Review > Productions & Exports > Exports.
- In the Export History list, locate the previously zipped export you want to work with, click its Action icon
 and select Recreate Zip.
 - On the Recreate ZIP dialog box, click Proceed.
- To view the status of the task, click the Notifications icon
 and view the Zip Export.