Image Profiles
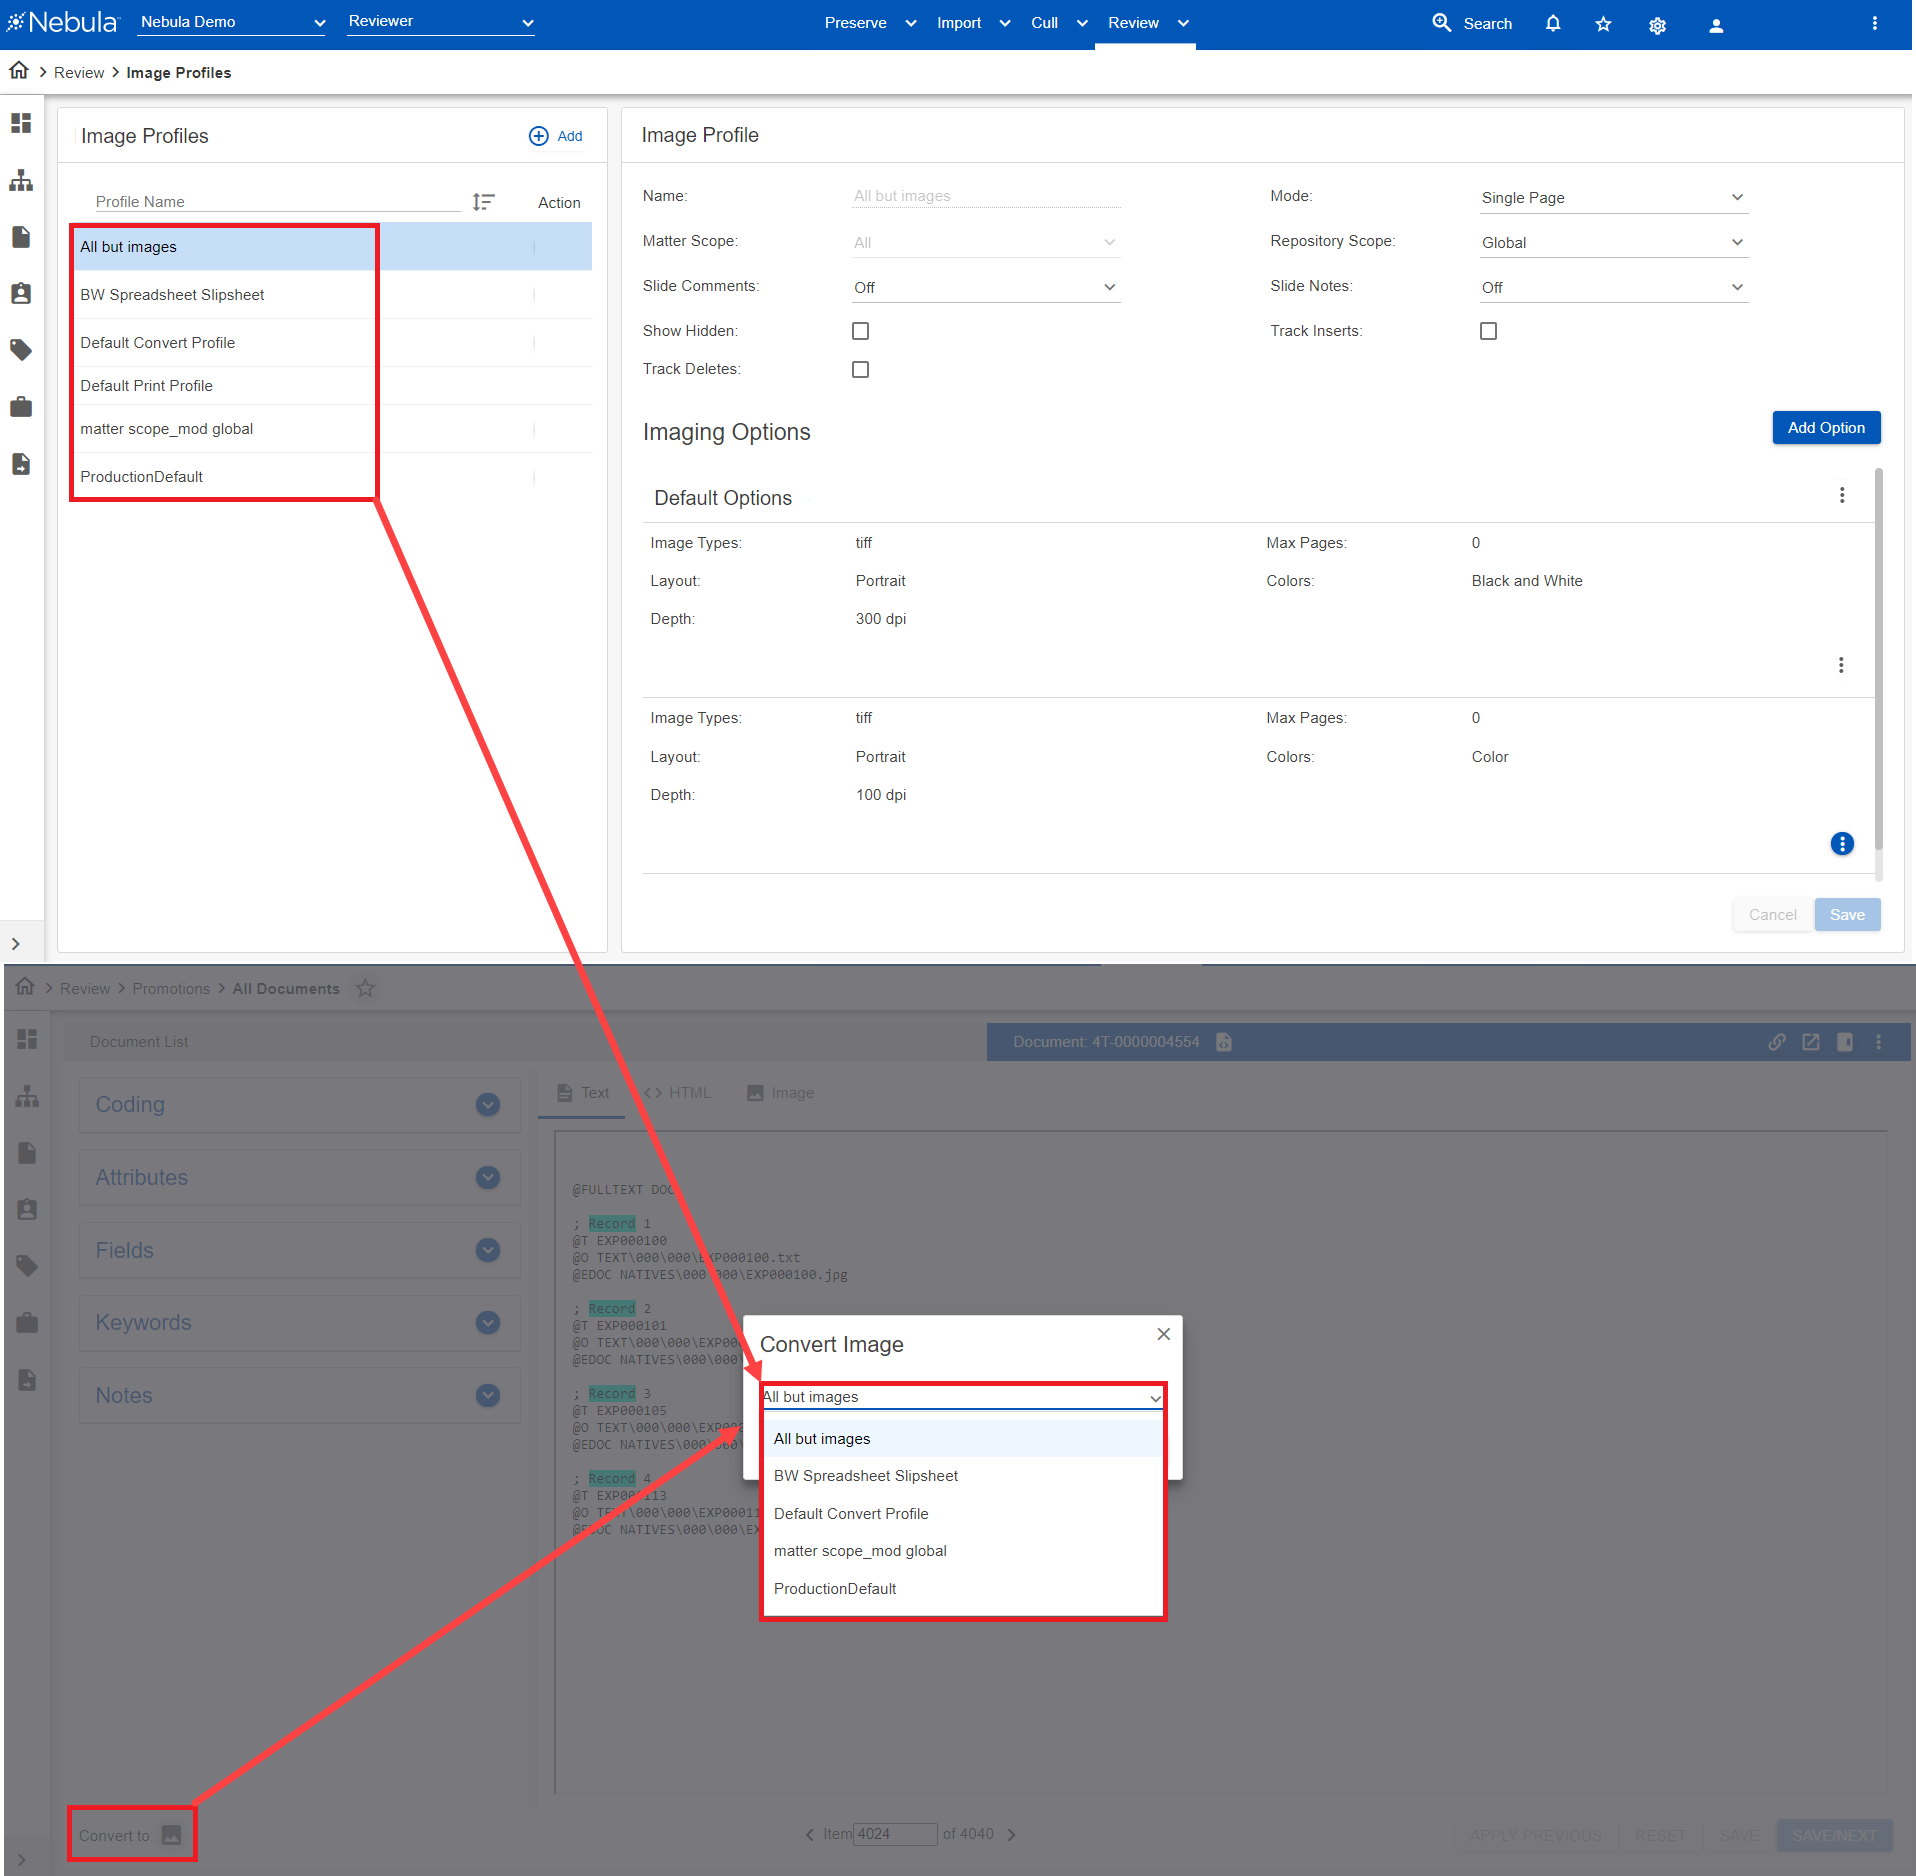
Use the Image Profiles page to define the settings used when converting a native image to an image. A profile can contain default imaging options, as well as options set for application (such as Microsoft Excel) or category of document (such as spreadsheet).
To view the Image Profiles page
- Click Review > Productions & Exports > Image Profiles.
To add an image profile
- On the Image Profiles menu bar, click

- On the Image Profile section, do the following:
- Name: Enter the name of the image profile.
- Mode:
- Matter Scope: Select matter where this profile is available (either the current matter or all matters).
- Repository Scope: Select repository where this profile is available (either the current repository or all repositories).
- Slide Comments (Applies only to PowerPoint documents) Select how slide comments are processed from the following:
- On: Include.
- Off: Exclude.
- Append: Add to the end of the image.
- Speaker Notes: (Applies only to PowerPoint documents) Select how speaker notes are processed from the following:
- On: Include.
- Off: Exclude.
- Append: Add to the end of the image.
- Show Hidden: Select to display hidden content.
- Track Inserts:
- Track Deletes:
- Click Save.
To add imaging options to an image profile
- On the Image Profiles section, locate and click the profile you want to receive an imaging option.
- In the Image Profile section, click Add Option.
- On the Add Imaging Options dialog box, do the following:
- Document Type: Select if option applies to an Application (name of application) or Category (document type).
- Application Doc Types: Select if Application was selected as the Document Type.
- Category Doc Types: Select if Category was selected as the Document Type.
- Image Types: Select the format of the image.
- Option Type: Imaging (default) Apply to image of the document.
- Export Natives Override: Select to override exporting the native file when converting an image.
- Max Pages (Imaging only): Select the maximum number of pages of the document to be converted to an image
- Layout (Imaging only): Select either Portrait or Landscape.
- Depth (Imaging only): Select the dpi (dots per inch) of the image.
- Colors (Imaging only): Select the color of the image, either Black and White, Grayscale, or Color.
- Click Create.
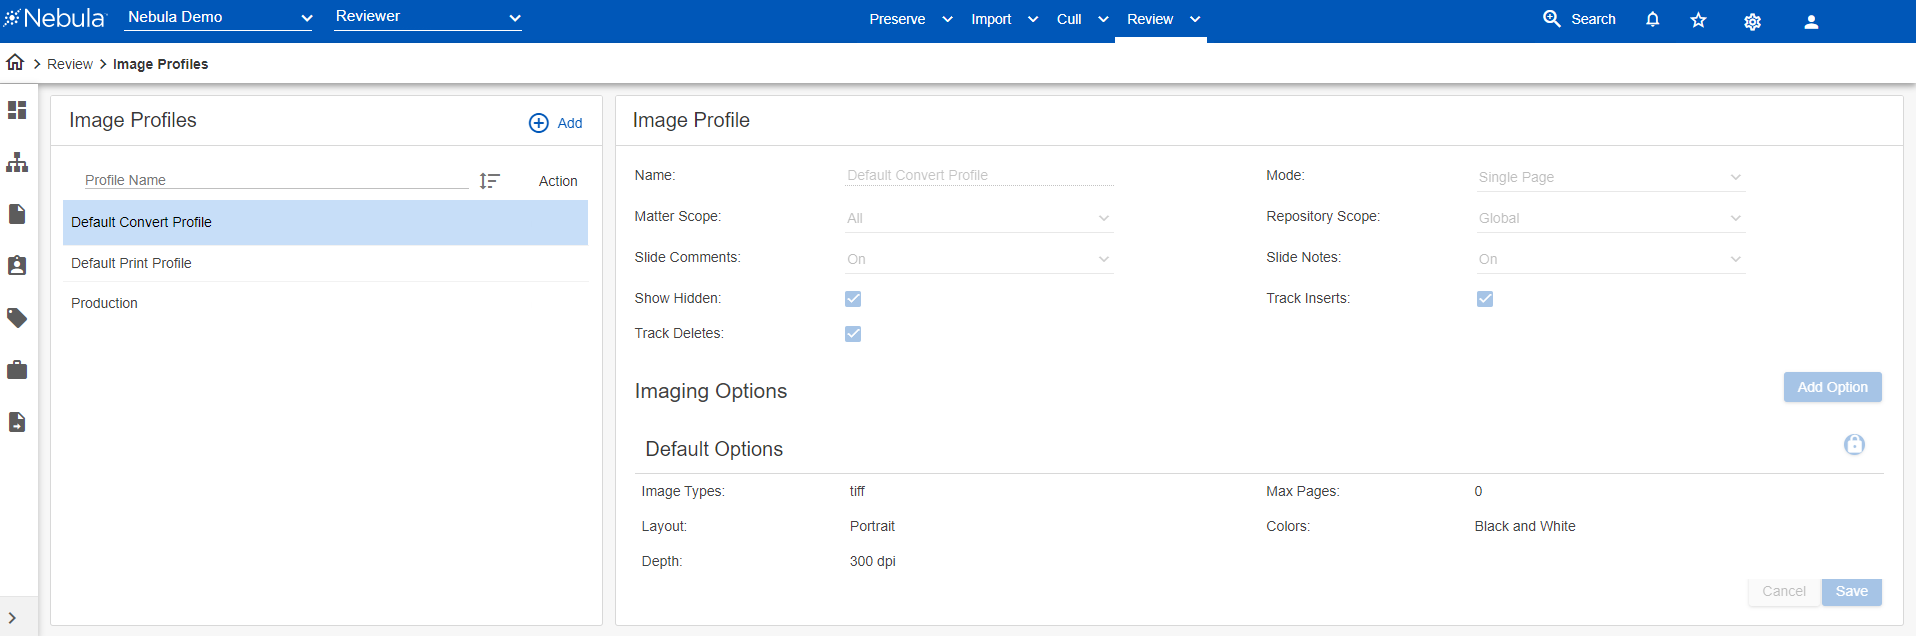
To edit an image profile
- On the Image Profiles section, locate and click the profile you want to edit.
- Update the Image Profile section accordingly.
- To update an imaging option, do the following:
- Click the Action icon and select Edit, then use the Edit Imaging Option dialog box to edit the Default Options section accordingly.
- Click the Action icon and select Edit, then use the Edit Imaging Option dialog box to edit the Spreadsheet section accordingly.
- Click Save.
Default Options section
Spreadsheet section
To clone an image profile
- On the Image Profiles section, locate the profile you want to clone and click its Action icon.
- Select Clone.
- Enter an image profile Name and update the Image Profile and Imaging Options sections accordingly.
- Click Save.
Note: All information about the image profile (expect the Name) appears in the Image Profile and Imaging Options sections.
To delete an image profile
- On the Image Profiles section, locate the profile you want to delete and click its Action icon.
- Select Delete.
- On the Delete Confirmation dialog box, click Delete.
- Click Save.