Dashboard (Import)
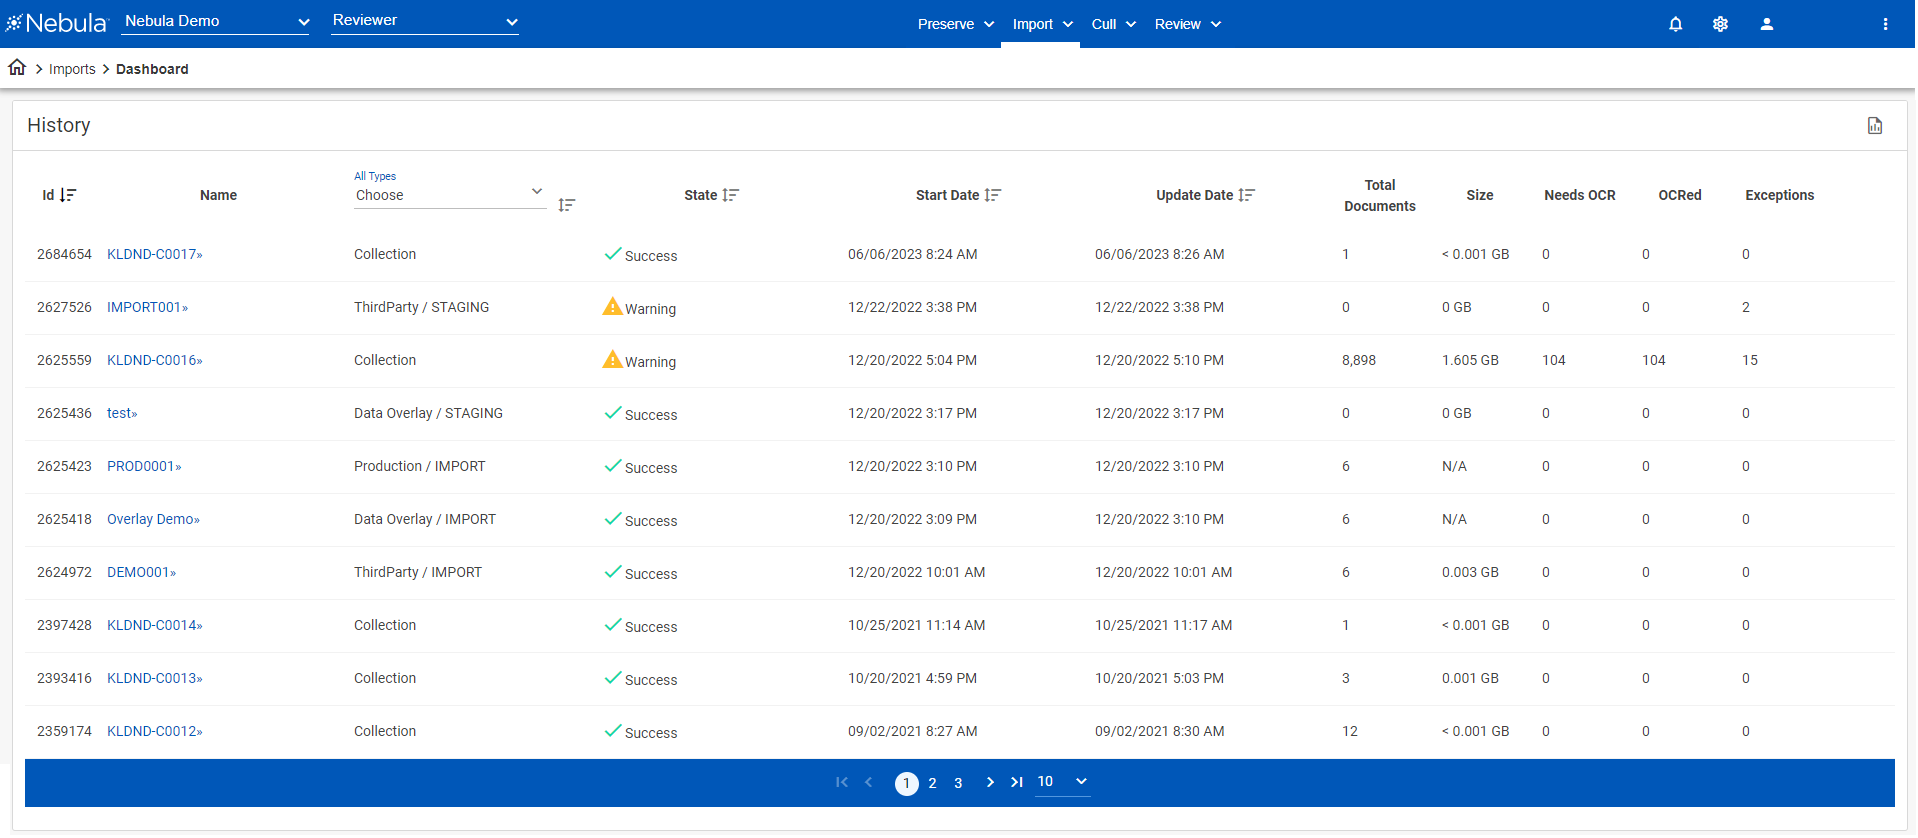
The Import Dashboard displays a summary of every collection of ingested files (imports) in Nebula, whether they are completed, on going, or queued. Each import has a unique name and displays a state (success, warning, or fail), a start date time and an end date time, and a summary of information regarding the documents imported. The Dashboard's History page enables you to review the import history dating back to the creation of the repository. You can also use the History page to run post-processing tasks, including identifying language present in a collection and NLP processing.
Types of Imports
Processing imports are labeled Collections on the dashboard,
Pre-processed data (or produced content) imports are labeled ThirdParty.
Content overlays are labeled Data Overlay.
Production overlays are labeled Production.
Third party, data overlay, and production imports will also indicate whether they have been staged, in which case the import displays STAGING. Staging is the step by which Nebula verifies the potential imports for exceptions, errors, or issues. If the import has completed, the import displays IMPORT.
To view the History page
- Click Import > Dashboard.
Import History Actions
Clicking the Action icon ![]() for a document set enables you to perform the following tasks:
for a document set enables you to perform the following tasks:
- View additional details of each entry
Every collection or import in a repository has a details page. The details available will differ depending on the type of import.
To view details of an import collection
- In the History list, locate the import collection you want to view in detail.
- Click its Action icon
and select Details.
- View the import collection's details.
To delete an import collection
- In the History list, locate the import collection you want to delete.
- Click its Action icon
- On the Delete Item dialog box, click Delete.
- Run Language ID
- On the Cull Document List, click the Action icon
 and select Run Language ID.
 - On the Run Language ID dialog box, enter the following information on the Language Options tab:
- Max Text Snippet Size: 10 KB to 20 MB
- Language Probability: 0.05 to 0.99.
- Detection Mode: Single or Multiple.
- Select to Detect OCRed Documents. Clear to include.
- Detect Languages in only undetected documents or all documents.
- Min File Size: 10 Bytes to 300 Bytes.
- Short to Normal Threshold: 50 Bytes to 1000 Bytes.
- Select to Ignore Spreadsheets. Clear to include.
- Click Save.
Language ID is a process that attempts to identify the language(s) in documents. Documents with very little text or with mostly numbers (such as spreadsheets) tend to make poor candidates for language identification. The Language ID tool can be configured to detect the predominant language or to try to detect multiple languages with a document.
To detect language
- Apply NLP Processing
Natural language processing tools analyze document text in authored content.
Sentiment analysis works to determine whether the communication is positive, neutral, or negative. Sentiment analysis is typically run on communication-type documents, like emails.
Named Entity Detection works to identify and classify entities within a document, such as names of people, places, or organizations, and groups them into a set of categories.
You can configure the NLP tool to perform sentiment analysis or named entity detection, or both.
To apply NLP Processing
- In the History list, locate the import collection you want to work with.
- Click the Action icon
- On the Natural Language Processing dialog box, select the type of NLP process you want to apply (Entity Recognition, PII/PHI Detection, Sentiment Analysis), then choose its Application Categories.
- To include documents added to the collection since the last time it was processed, select Reprocess Existing Data.
- Click Start.
- Reindex Collection
Reindexing can be run in the event that the Nebula search index becomes out of sync with the text in a collection. The re-index process brings the collection index back into sync in the database.
Note: This is not a common occurrence and performing collection reindexing is not recommended without the guidance of the Nebula TechQ support team.
To reindex collection
- In the History list, locate the import collection you want to work with.
- Click the Action icon
- On the Reindex Collection dialog box, click Reindex.
- Create an Optical Character Recognition (OCR) collection
OCR generates searchable text from image-type documents, such as scanned documents that aren't otherwise searchable. Any doucments that Nebula is unable to successfully
To create an OCR collection
- In the History list, locate the import collection you want to work with.
- Click the Action icon
- On the OCR Collection dialog box, select the following:
- Items
- Priority
- Language profile
- Click Save.
- Export records needing OCR
In the events that Nebula is unable to successfully perform OCR for documents in a collection, this process enables you to export affected documents so that OCR can be run using separate external tools and then to re-import the results back into Nebula.
To export needs OCR
- In the History list, locate the import collection you want to work with.
- Click its Action icon
- On the Export Needs OCR dialog box, select the Items.
- Click the Folder icon to select Output.
- Click Save.
- Import OCR
To import OCR
- In the History list, locate the import collection you want to work with.
- Click its Action icon
- On the Import OCR dialog box, click the folder icon to Select input.
- Click Ok.
- Process the import collection
To process the import collection
- In the History list, locate the import collection you want to process.
- Click its Action icon
- Complete the Upload Files page.
- Update attribute totals
To update the attribute total the Imports History page
- On the History menu bar, click the Update Totals icon
.
Note: If the attribute totals do not need to be recalculated, the icon is unavailable
.